
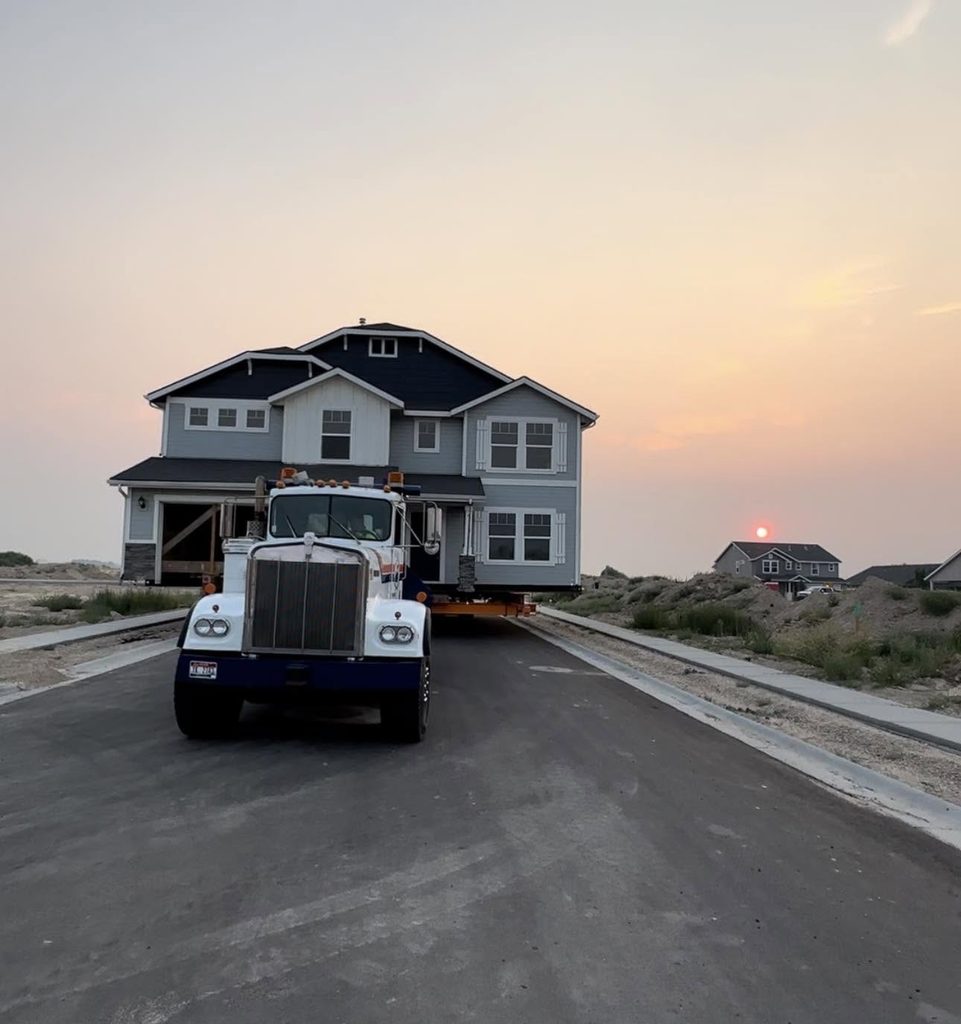
Raising a house off its foundation sounds like something out of a movie, but it’s a real and fairly common construction practice used to solve serious structural, flooding, and foundation problems. Whether a homeowner is dealing with chronic flood damage, sinking piers, or the need for a taller crawl space, professional house lifting can extend the life of a home by decades. Still, most people have never watched this process happen and have no idea what actually goes on behind the scenes. This guide walks through each stage of a house-lifting project, from the first inspection to the final foundation work, so homeowners know exactly what to expect.
Why Homeowners Choose to Lift a House
Before getting into the mechanics of the job, it helps to understand why someone would go through the trouble of raising an entire structure. There are several common motivations behind a house-lifting project:
- Repeated flood damage from rising water levels or a home located in a flood zone
- A sinking, cracked, or otherwise failing foundation that needs full replacement
- The desire to add a basement or taller crawl space beneath an existing home
- Termite or water damage to the foundation or lower floor framing
- Compliance with updated FEMA flood elevation requirements
- Preparing a home to be relocated to a new lot
In many coastal and river-adjacent communities, insurance requirements and local building codes actually push homeowners toward elevation projects. Lifting the home above the base flood elevation can lower insurance premiums significantly and, in some cases, is required to keep a property insurable at all.
Step One: Initial Assessment and Planning
Every professional house-lifting project starts with a detailed site evaluation. A structural engineer or lifting contractor visits the property to assess the home’s construction type, foundation condition, and overall weight distribution. This step determines whether the house is even a good candidate for lifting, since some structures (particularly those with unusual additions, extensive water damage, or unstable soil beneath them) require extra reinforcement or a different approach entirely.
During this phase, the team typically evaluates:
- The type of foundation currently in place (slab, crawl space, or basement)
- The construction materials and overall structural integrity of the home
- Soil composition and drainage patterns around the property
- The desired final height and purpose of the lift
- Local permitting and code requirements
This assessment produces a lifting plan that outlines the equipment needed, the estimated timeline, and the cost. Because every home is different, no two lifting plans look exactly alike.
Step Two: Permits and Utility Disconnection
Once a plan is in place, the contractor files for the necessary permits. House lifting is a heavily regulated activity in most jurisdictions because it affects structural safety, floodplain management, and sometimes historic preservation rules. Permitting can take anywhere from a few weeks to a couple of months depending on the location and the scope of the project.
While permits are being processed, crews begin preparing the home itself. This includes disconnecting all utilities that run into the structure, such as:
- Electrical service
- Plumbing and sewer or septic connections
- Natural gas or propane lines
- HVAC ductwork tied to the foundation
- Cable, internet, and phone lines
Disconnecting these systems safely is critical, since the house will be physically separated from its foundation and moved upward, sometimes by several feet.
Step Three: Structural Preparation
This is where the real engineering work begins. Crews need to create access points beneath the home so that lifting equipment can be positioned correctly. In a house with a crawl space, this might mean opening up sections of the foundation wall. In a slab-on-grade home, workers often need to cut and remove sections of the slab.
Steel I-beams are then threaded beneath the house, running perpendicular to the floor joists. These beams distribute the weight of the entire structure evenly so that no single point bears too much stress during the lift. Additional cribbing, made of stacked wood or steel blocks, is placed at strategic points to provide temporary support as the beams are positioned.
This stage requires precision. If the beams are not placed correctly, the house could shift unevenly during lifting, leading to cracked walls, broken windows, or worse. Experienced house-lifting companies rely on engineers to calculate exact beam placement based on the home’s weight and structural layout.
Step Four: Positioning the Hydraulic Jacks
With the steel beams in place, the crew installs a network of hydraulic jacks beneath the structure. These jacks are connected to a unified hydraulic system, which allows them to raise in perfect synchronization. This synchronization is what separates professional house lifting from any kind of makeshift or DIY approach. Raising a multi-ton structure unevenly, even by an inch, can cause catastrophic structural failure.
Modern lifting systems use computer-controlled hydraulics that monitor pressure at each jack point continuously. If one section of the house begins to rise faster than another, the system automatically adjusts to keep everything level. Some larger commercial or historic structures may use dozens of jacks working together under this kind of centralized control.
Step Five: The Actual Lift
This is the part most people picture when they imagine house lifting, and it’s often surprisingly slow and undramatic to watch. The house is raised in small increments, often just a few inches at a time, with pauses in between to reposition cribbing and verify that everything remains level and stable.
Depending on the desired final height, this process can take anywhere from a single day to over a week. A home being raised two or three feet to meet new flood elevation standards might be finished quickly, while a home being lifted six to ten feet to allow for a new basement level takes considerably longer.
Throughout the lift, engineers monitor:
- The structure’s level and plumb alignment
- Any new cracking in walls, ceilings, or foundations
- The stability of the cribbing supporting the house at each stage
- Weather conditions, since high winds can be dangerous during a lift
Once the house reaches its target height, it is left resting securely on temporary cribbing while the next phase of work begins.
Step Six: Foundation Work
With the house safely elevated, the crew turns its attention to the ground below. This is often the primary reason for the entire project. Depending on the homeowner’s goals, this phase might involve:
- Pouring a new, taller foundation wall
- Building a full basement beneath the elevated structure
- Installing new footings to meet updated code requirements
- Repairing or replacing damaged foundation elements
- Installing new support piers or pilings, particularly in flood-prone areas
This stage can take several weeks, especially if a new basement is being excavated. Concrete needs time to cure properly before it can bear the full weight of the house again, so patience is required even after the physical lifting is complete.
Step Seven: Lowering the House
Once the new foundation has cured and passed inspection, the house is lowered back down using the same hydraulic system that raised it. This step is just as carefully controlled as the initial lift, with engineers making sure the structure settles evenly onto its new foundation walls or support piers.
After the house is set in place, crews remove the steel beams and cribbing, patch any openings that were created in the foundation, and begin reconnecting utilities. Final inspections are typically required before the home can be reoccupied, particularly if the project was tied to flood compliance requirements.
Step Eight: Final Touches and Inspection
The last stage of a professional house-lifting project involves reconnecting all utilities, restoring landscaping and exterior features disturbed during the lift, and completing any cosmetic repairs. Homeowners often notice minor cracks in drywall or trim after a lift, which is a normal side effect of a large structure settling into a new position. Reputable contractors typically include minor touch-up work in their final walkthrough.
A final inspection from the local building department confirms that the new foundation meets code and that all utility connections are safe and functional. Once that inspection is passed, the home is officially ready for occupancy.
Frequently Asked Questions
How long does a house-lifting project take from start to finish? Most projects take between four and twelve weeks total, though this varies widely based on the height of the lift, the complexity of the new foundation, and how quickly permits are approved.
Is it safe to live in the house during the lifting process? No. Homes are fully vacated before the lift begins, since utilities are disconnected and the structure is unstable while resting on temporary supports.
How much does professional house lifting typically cost? Costs vary significantly based on the size of the home, the height of the lift, and the condition of the existing foundation, but most projects range from tens of thousands of dollars to well over one hundred thousand for larger or more complex jobs.
Can any house be lifted? Most wood-frame homes can be lifted, but brick, stone, and some masonry structures require additional engineering and reinforcement. A structural assessment early in the process will confirm whether a specific home is a good candidate.
Will lifting my house cause damage? Some minor cosmetic damage, such as small drywall cracks, is common and expected. Significant structural damage is rare when the project is handled by an experienced, licensed contractor using properly calculated beam and jack placement.
Do I need a permit to lift my house? Yes. Because the process affects structural safety and often relates to flood zone compliance, permits are required in virtually every jurisdiction.
Why do people lift houses instead of tearing them down and rebuilding? Lifting preserves the existing structure, which is often more cost-effective than demolition and new construction, and it allows homeowners to keep a home’s character, layout, and history intact while solving flooding or foundation problems.
Choosing the Right Contractor for the Job
Given the complexity and risk involved, selecting an experienced contractor is the most important decision in the entire process. Homeowners should look for a company with a strong track record specifically in structural lifting, not just general construction or foundation repair. Ask for references, verify proper licensing and insurance, and request a detailed written plan before signing any contract. A qualified professional house-lifting company will be transparent about timelines, costs, and the specific engineering approach they plan to use for the home.
House lifting is a demanding, highly technical process, but it offers homeowners a powerful solution to problems that might otherwise seem impossible to fix. From the initial engineering assessment through the final inspection, every step is designed to protect the integrity of the home while giving it a stronger, safer foundation for years to come.